Tuesday, August 30, 2011

Sally Hansen Mint Sprint

Since some of the little chips in Zoya Phoebe were starting to drive me crazy, I figured it was time to switch it up. I kind of forgot I had this polish until a few days ago, but having re-discovered it now, I'm really happy with this one. Mint Sprint is a mint green creme, as the name implies, but it's also got a hint of teal to it. It maybe looks a bit more blue-toned here than it does in real life.

 (Sally Hansen Mint Sprint, two coats)

This is pretty much opaque with one coat, but I used two here just because I'm OCD like that. The formula on this is absolutely perfect. I didn't use topcoat for this one because it has enough shine to it on its own and it dries VERY quickly. It holds true to the Insta-Dry name; I waited maybe 30 seconds and then got on with my day without any chips or dents. Awesome! I find that Sally Hansen polishes in general rarely have poor formula.

However, as I also mentioned when I posted about Barracuda, I know a lot of people have a love it or hate it attitude about the Sally Hansen brushes and I am definitely in the latter category. It's not a bad brush necessarily, it's just...weird. The tip is smaller and thicker than most polish brushes and it's simply not a shape I really like working with, but chalk that up to personal taste. It doesn't make me like this polish any less though. :)

Monday, August 29, 2011

Zoya Phoebe

I needed something quick-drying today so I could get to class on time (wouldn't wanna be late on the first day!). I went with Zoya Phoebe, a matte electric blue. I like the contrast of a vibrant neon with the flatness of a matte finish.


Formula on this was good, not unruly or overly thick like with some mattes. I did three coats here. But being a matte finish, Phoebe doesn't have a lot of longevity. I'd only been wearing it for a few hours and I already had some little chips and dents around my tips. But that's kind of what I expect from mattes; you can't seal it with a topcoat if you want to preserve the finish, so that, coupled with the different formula, will inevitably result in shorter wear.

However, Phoebe actually looks really cool with a topcoat! I wore her matte today but I thought I'd show you how she is with one coat of Seche Vite. The matte particles create a noticeable sparkle once you add topcoat. I like it both with and without!


Phoebe is definitely a really nice shade and the Zoya mattes are a good place to start if you've never played around with this type of finish before; fun colors and a manageable formula.

Sunday, August 28, 2011

OPI Glitzerland

Today I've got one of my go-to polishes for you: OPI Glitzerland. I seem to turn to this polish a lot when I can't decide what to wear since it's pretty and goes with almost anything. Glitzerland is a gold foil from the OPI Swiss collection. These probably aren't the best pictures of this since I didn't have the benefit of sunlight while taking them, but oh well.

(OPI Glitzerland, three coats plus topcoat) 

This is beautiful but admittedly, it's not all that unique; there are lots of gold foils out there. But this is hands down my favorite and I've been meaning to get a back-up of it for a while now. I love the warmth this shade has to it; perfect for any season.

Saturday, August 27, 2011

Essie Splash of Grenadine

I'd intended to wear Frostbite for a while longer, but I wound up having a job interview (have to find somewhere to work now that I'm up at school) and figured bright blue nail polish, while awesome, was probably not professional. So I put on something a little safer: Essie Splash of Grenadine. It's still bright, but it's less distracting than Frostbite's neon blue.

 (Essie Splash of Grenadine, two coats plus topcoat)


There was some definite color shrinkage when I put the topcoat over this one and I already have some tip wear and one or two small chips after less than 24 hours wearing this. While I like this shade-it's a cheery purply pink with a creme finish-I'm not exactly impressed with the longevity of it. Oh well; it lasted through my interview at least!

Friday, August 26, 2011

China Glaze Frostbite

Frostbite is awesome, pure and simple. It has perfect formula and ridiculously intense color; it somehow manages to be a deep, glossy blue but have an almost neon-like brightness to it. This one comes from the Ski Collection released a few years back and while I've never actually been skiing (unless you count cross-country skiing once), I love the bright, metallic colors in that collection.

 (China Glaze Frostbite, two coats plus one topcoat)

I used a topcoat here, as usual, but this has a shiny finish even without one. China Glaze describes this is a "high lustre pearl" finish, which to me looks like a cross between a frost and a shimmer polish. If you are a blue lover and don't have this in your collection already, GET IT! This is my favorite blue in my collection right now.

Thursday, August 25, 2011

Wet N Wild Morbid

I've had this polish in my collection for a while now and I originally picked it up since I'd heard it's quite similar to Chanel Black Pearl. (Apparently so is Sally Hansen Gunmetal, but I've never gotten around to trying that one out.) Morbid is black with dark green/teal shimmer and was released as part of the Craze collection back in 2009. I used two coats for these pictures.


At 0.34 fl oz, this is smaller than your average polish (For comparison, OPI bottles are 0.5 fl oz), although I wouldn't say it's a mini bottle either. But since it costs around a dollar at the drug store, you're getting a very good deal for the amount of polish here.

The brush on this is on the smaller side, so it made application a bit awkward. I usually don't get very good wear out of this polish; even when I use a topcoat I start to see chips and tip wear within a day or so. Speaking of topcoat, I also tend to get some color shrinkage when I put topcoat on this. But it's cheap enough and cool-looking enough for me to forgive this polish's shortcomings.

Wednesday, August 24, 2011

OPI Pros & Bronze

As promised, here is the other half of the Serena Willams Glam Slam US duo: Pros & Bronze, which comes with Love Is A Racket. Pros & Bronze is a foil polish with rosy copper and gold microglitter. I guess this is technically bronze but to me it also looks kind of like rose gold, which I love. Although I wound up liking Love Is A Racket, Pros & Bronze is the reason I bought this duo and it doesn't disappoint.

(OPI Pros & Bronze, three coats plus one topcoat)
 

This is super sparkly on the nail and the color is perfect for both summer and fall. I wouldn't call this is a true duochrome but it does flash different colors as the light changes. I feel like this polish could have been right at home in last year's Burlesque collection, so if you liked polishes from that set like Rising Star and Take The Stage, check out Pros & Bronze.

Tuesday, August 23, 2011

OPI Love Is A Racket

Love Is A Racket is one of the polishes in OPI's newest Serena Williams Glam Slam duo, Glam Slam US. Whereas the past duos consist of one regular polish and one shatter, Love Is A Racket comes with Pros & Bronze, a metallic shade (which I'll show you for my next mani). Love Is A Racket itself is a neon red glass fleck shimmer with a hint of coral.

 (OPI Love Is A Racket, two coats plus one topcoat)

I had a little trouble getting the shimmer in this to show up on camera, maybe because it's overcast outside today, but it's very bright on the nail and gives the color a nice shine. I honestly wasn't expecting to like this too much (ANOTHER red?) but it's actually a a cool shade; the glass fleck gives it something extra. Pros & Bronze is still the star of this set, but this is a good choice for a summer mani since it's so bright.

Saturday, August 20, 2011

OPI Muppets Collection

So for their upcoming holiday collection, OPI will be collaborating with the Muppets! The collection will feature 12 shades: six glitters and six cremes/shimmers, like last year's Burlesque holiday collection. Judging by the press release, it looks like Gold Shatter will be released with this collection as well, although you can pick up Nicole By OPI Gold Texture now if you can't wait 'til then. I thought I'd share the press release bottle pics with you today so you can start your holiday beauty wishlists early! :) Click to enlarge so you can see everything up close!


I'm guessing these will start hitting the shelves sometime around November, although I don't believe there's an official release date yet. I think I'll be picking up three or four of the glitters and maybe Warm and Fozzie. How about you?

Also, just so you know, this was TOTALLY my show when I was little!

OPI Steady As She Rose

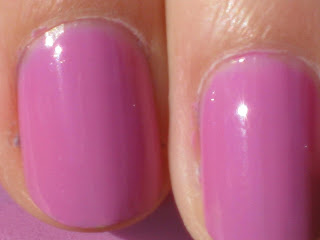
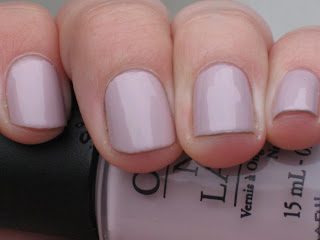
How do I describe this color? The name is definitely misleading; it's not rose-toned at all. I'd say it's either a very washed out lavender or a greyed out pink. I guess I'll just let the pictures do the talking so you can decide for yourself!


Formula on this is great; no complaints. I used three coats for the photos above. The color is definitely on the more neutral-toned side for me, since I tend to like polishes that are richly colored. I'd also be interested in seeing this color on someone who is less pale than I am; I think it's weirdly close to my skin color somehow. But overall I like this. I wanted to wear a polish that wouldn't show a lot of dents or chips since my hands will likely get beat to hell tomorrow when I move into my new apartment.

If you like the murkiness of Steady As She Rose but want a more punched-up color, try OPI Sparrow Me The Drama, which is also from the Pirates of the Caribbean collection.

Friday, August 19, 2011

Revlon Carbonite

Last week I showed you Sally Hansen Barracuda, a dupe for Chanel Riva. Today I have yet another Chanel dupe for you! This one is Carbonite, Revlon's version of Chanel Graphite. This is not the first time Revlon has put out a color to match the latest buzzworthy Chanel shade; you may also recall Perplex, a dupe for Chanel Paradoxical and Black With Envy, their version of Chanel Black Pearl.


Graphite is a dark silver with some flecks of gold and a near-foil finish. While Carbonite doesn't have that subtle gold in it, it's still pretty darn close to Graphite.

(Revlon Carbonite, two coats)

Carbonite lacks some of the depth of color Graphite has, but I'd say they're definite dupes. And at just $4 for the Revlon, I really can't complain about whatever minute differences the two may have; they're close enough for me. :) I'm glad Revlon put this out because I was starting to waver on my decision not to buy Graphite. What can I say? Chanel makes some amazing colors for some not-so-amazing prices.

But since I can't leave well-enough alone, I decided to add a coat of gold glitter on top to try and mimic some of that extra warmth Graphite has. I think it turned out pretty well. Here's Carbonite with one coat of Sinful Colors All About You. (Sorry for the messiness around the edges! I was in a rush!)


Carbonite is a bit harder to find than your typical Revlon shade and people will likely be snapping this up since it's a known Chanel dupe. When I got mine at the store, it was on its own display shelf away from the rest of the Revlon. Keep your eyes open for this one!

Thursday, August 18, 2011

Orly It's Not Rocket Science

This is the first Orly polish I ever bought: It's Not Rocket Science, from the Cosmic FX collection (which has plenty of other super cool shades worth checking out, by the way). Let me just say, I am in LOVE with this!

(Orly It's Not Rocket Science, three coats plus one topcoat)

In the bottle it looks like there is some teal duochrome to this polish, which unfortunately doesn't translate onto the nail, but I don't mind because It's Not Rocket Science is awesome enough as-is. I would describe this as a swampy green shimmer; one of those ugly-pretty colors that I tend to gravitate to for polish. I love green polish and this is one of my favorites for sure. I almost don't want to take it off!

At $10, the Cosmic FX polishes cost more than the usual $7 Orly price point. But if you like this color and want to save a few bucks, it's apparently very similar to China Glaze Zombie Zest from last year's Halloween collection.

Wednesday, August 17, 2011

How To Remove Glitter Polish--The Easy Way!

A little while back I showed you Milani FX Gems. While I love glitter polishes like this one, I used to wear them less than I would have liked because of what a royal pain they are to remove. Glitter polishes are notoriously gritty and tough to take off your nails. I always dreaded the long, annoying process of trying to wipe off all that stubborn glitter with a cotton ball. But thankfully I discovered the foil method on the Internet!

Here's how I removed my Milani FX Gems manicure. This will work with any glitter polish and save you from having to scrub all those sparkles off.


You will need:
  • Nail polish remover (preferably acetone-based, but if you have dry nails, you should probably stick to acetone-free)
  • Cotton rounds
  • Scissors
  • Aluminum foil
  • Cuticle moisturizer

Step 1: Cut five cotton rounds in half.


Step 2: Soak one cotton round in nail polish remover and then wrap it around your nail like so:


Step 3: Wrap a strip of aluminum foil around your finger to keep the cotton round in place and pressed up against your nail. Repeat steps two and three with the rest of your hand. It should look something like this when you're all done:


Step 4: Wait around five minutes. Read a book, go on the computer, watch TV or relax however you like. Once time is up, remove the foil and the cotton rounds. The wet cotton round will have absorbed the majority of the glitter. If you still have a few glitter pieces here and there on your nail, it should easily rub right off.

Step 5: Rinse your hands to remove all the acetone and then moisturize your nails right after. Exposing them to acetone for this long WILL dry them out, so use this method with care and make sure not to skip this last step!

Tuesday, August 16, 2011

Essie Wicked

I've been showing you a lot of OPI lately, so I thought I'd switch things up with some Essie today. Wicked is a dark, brownish plum. I did two coats here, but with three it looks near-black. Conversely, you could try one coat to get more of a reddish plum look so long as you don't mind that the color wouldn't be completely even or opaque. (Also I apologize for the weird smudge on my middle finger. I have no idea what that is.)


Wicked has a squishy jelly finish, which I really like with a dark color like this. This is a classic vampy shade that would be great for fall and a perfect alternative to a sexy red manicure. I think I chose this color today because we're starting to sell fall clothing and boots at my job. Yes, already!

Monday, August 15, 2011

OPI It's Totally Fort Worth It

For my very first post on this blog, I showed you a polish from OPI's Texas collection: Austin-Tatious Turquoise, a color I liked with a formula I did not. Well today I have another polish for you from the Texas collection: It's Totally Fort Worth It.


This is a pale grey shimmer, but it also has some pink glitter, which is very subtle on the nail; you probably can't see it below unless you click to enlarge.


The formula on this is a little on the runny side, but after the first coat, I got the hang of it. The polish is also quite sheer; the pictures above are four coats. But it's a nice color if you want some sparkle without looking too loud.

Also-and I have to mention it just because this association is so strong in my mind for some reason-this color makes me think of a satin Old Hollywood gown, like maybe something Mae West would have worn. Don't ask me why that's what I think of or what Mae West has to do with Texas (She was from Brooklyn) but that's just naturally what my mind went to.

How To Strengthen Your Nails

This post is in response to a particular reader (Hi out there!) who wrote me this request: "Can you put something on your blog about hardening your nails please? Mine always break."

At the drugstore, you probably see lots of topcoats and nail treatments claiming to harden your nails, but there are plenty of easy-and mostly free-ways to keep your nails strong without them!


Tip 1: MOISTURIZE. This is a big one. Your nails need the proper amount of moisture, just like your skin does. Most nails break or crack because they are dry and brittle. Keep a nail or cuticle moisturizer in your purse and use it throughout the day and especially after you use nail polish remover (see Tip 3). My personal favorite is Smith's Rosebud Salve, since you can also use it on your lips too and Burt's Bees makes a great cuticle cream as well.

Tip 2: Don't pull off hangnails or cuticles. When you do this, you are most likely ripping living tissue too. Instead of tearing off a hangnail, use a pair of nail scissors or other small clippers to remove the loose piece and keep the rest of your nail tissue intact. Biting your nails can be also just as bad as picking at them, since you're spreading bacteria from your mouth to your nails.

Tip 3: Use nail polish remover with care. Many nail polish removers contain acetone, which is extremely drying to your nails. If you have brittle nails, avoid acetone-based removers, or if you choose to use a remover with acetone (they are great for getting off glitter polish in particular), rinse your hands as soon as all of your polish is off in order to minimize your nails' contact with the acetone. Ideally, you should only use nail polish remover one or two times per week. (Although if you're like me and love changing your polish, this really is not possible!)

Tip 4: Keep your nails short. Shorter nails are obviously less prone to breaking. It's best to clip your nails right after a bath or shower, as the hot water will have softened them up. If you want to keep a bit more length to your nails, use a file to create a clean, rounded line on areas where you notice breakages, splits or brittleness. This way you can minimize overall damage while still maximizing your nail length.

Tip 5: Don't use your nails as tools. This should be a no-brainer, but using them to peel off stickers, break seals, scrape surfaces, etc. will only weaken your nails.


Tip 6: Try a home remedy. One of the most popular is soaking your nails in lemon juice, either from a bottle or directly from the fruit itself. Submerge your fingernails entirely in a bowl of lemon juice and let them soak for around fifteen minutes. Keep this up regularly, as your nails will absorb the minerals in the lemon juice, allowing the proteins and keratin in your nails to grow stronger and faster. You can also try brushing on olive oil to help keep your nails moisturized.

Tip 7: For severe cases, consult your doctor. Nails are a good indication of your overall health, so if yours are naturally very brittle, jagged, yellow or otherwise abnormal, bring it up next time you see your doctor. They can tell you whether it's a quick fix or the sign of an underlying issue like infection or a vitamin deficiency.

Sunday, August 14, 2011

Milani FX Gems

I like just about anything sparkly, so of course I love a good glitter polish. Milani FX Gems is probably best known for looking extremely similar to Happy Birthday, a polish from the queen of glitter, Deborah Lippmann. It was a bit overcast outside today, but this polish really comes alive in bright light! Feel free to click on the pics so you can see the glitter better!

Milani FX Gems (two coats, plus one topcoat)

I've included a close-up so you can see all the different colors and shapes of glitter in this polish. Since some of the glitter in the Milani is shaped differently than the Deborah Lippmann, I wouldn't say it is the EXACT same as Happy Birthday (which I will try to show you sometime soon), but they are close enough to be considered dupes and honestly, I don't think anyone could tell the difference without a side-by-side photo.


I used two coats here but you can definitely add on more glitter or layer this over another polish if you like. The formula on this was good, although sometimes I had a little trouble getting a few pieces of glitter to lie totally flat on my nail. A topcoat is also pretty much essential with this polish in order to help smooth out the gritty texture of the glitter.

You can most likely find Milani at your local grocery store. I got mine from Meijer for around $4.

Saturday, August 13, 2011

How To Whiten Your Nails

As much as I love nail polish, there are definitely times when it can stain or yellow your nails, either from using a dark shade or applying and removing polish very often. So here is an easy way to help make your nails look cleaner and whiter in between manicures!


You will need:
  • 3% Hydrogen peroxide (This can be found at most drug or grocery stores for around 90 cents. It's also great for removing stains on light fabric and as an anticeptic.)
  • Baking soda
  • A plate (or other mixing surface)
  • Cotton swabs
  • A spoon
  • Cuticle moisturizer of your choice (Here I am using Smith's Rosebud Salve, which I also like for dry lips and hands.)
Step 1: On your plate, mix two-and-a-half spoonfuls of baking soda with one spoonful of hydrogen peroxide. The mixture should have a paste-like consistency, so feel free to use more or less hydorgen peroxide until you feel you've gotten the right texture.


I know this looks like we're about to go all "Breaking Bad" here or something, but don't worry, it's harmless! :) Since hydrogen peroxide is primarily used as an antiseptic, it won't hurt your nails or skin. However, you can substitute lemon juice if you prefer.

Step 2: Using the cotton swabs, spread the paste over your nails. Make sure you get under your tips as well. If you have trouble getting under the nail, try using an old toothbrush.

Step 3: Wait three to five minutes.

Step 4: Rinse off the paste with warm water. Be sure to get it all out from under your nails too, otherwise the remaining paste will start to itch after a while.

Step 5: Generously coat each nail with your moisturizer to help fight off any dryness, irritation or brittleness.