Friday, January 31, 2014

Twinsie Tuesday: 2nd Anniversary Post

I can't believe it's already been two years of Twinsie Tuesday! Time has really flown and I am continually honored to be a part of this amazing group of ladies! I owe them so much and you would be hard pressed to find girls who are more creative, caring and supportive.

So to honor our second anniversary, we're doing a special post today where we've paired off with another Twinsie to try to re-create or do a manicure inspired by their first Twinsie Tuesday post. My Twinsie for this challenge is Kelly!

Sadly for me, Kelly's first post with us also happened to be one of my all-time least favorite TT themes: fishtail mani. Gah! Kelly created a gorgeous look for this theme...


...and I knew right away there was no chance in hell I'd be able to do it justice. But what better way to mark the anniversary of TT than with some sub-par nail art by me? ;) Twinsie Tuesday has always forced me to push my nail art abilities and try things I would otherwise be too intimidated to ever attempt. I struggled majorly with my fishtail mani for our original TT post! But I went the "inspired by" route and tried to come up with something relatively presentable. My freehand line skills are pretty crappy, so it didn't turn out all perfectly, but here is my attempt. I tried, Kelly! :)


Light blue: Lime Crime Once In A Blue Mousse
Dark blue: Pure Ice French Kiss
Silver: Essie No Place Like Chrome
White: Illamasqua Scorch

I altered the fishtail design a bit to make it easier for me to try and do. It kinda came out a little chevron-esque, which was not my intention. But I stayed as close to Kelly's original color palette as I could.  If nothing else, this manicure did serve as a good reminder of how utterly gorgeous Lime Crime Once In A Blue Mousse is!

I hope you'll enjoy today's anniversary manis across the Twinsie Tuesday blogs. Here's to two more years of TT!

Alaina at The Little Canvas
Amanda at Amandalandish
Chelsea at Nailed Blog
Elizabeth at Did My Nails
Kelly at Tuxarina
Lakeisha at Refined and Polished
Marisa at Polish Obsession
Rachel at Top Coat It
Róisín at Cuti-CLUE-les
Stephanie at A Little Polish
Traci at DrinkCitra

Rainbow Honey Be Mine


Screw the heart-shaped box of chocolates, I love getting make-up and nail polish on Valentine's Day!
Conveniently enough, today marks the re-release of Rainbow Honey's Valentine's Day-themed Sweet Talk Collection, complete with some cute new additions. So whether you're looking for some wishlist ideas to share with your special someone or you're in the mood to treat yourself, Rainbow Honey has you covered!

I received two polishes from the re-release to share with you, the first of which is Be Mine. Be Mine is a lovely pink creamsicle shade with gold flecks. I like the base color in this polish a lot and it has a nice neutral undertone to it that would make this a flattering shade on a variety of skintones. I don't have any other pinks quite like it in my stash!


The formula is wonderful and reaches opacity in three coats. The gold flecks in Be Mine are very prominent, so you won't be squinting or tilting your hand to just the right angle to try and catch a glimpse of them. They add a lot of gleam and glimmer to this polish, but it's still a great work-appropriate shade too!

You can purchase Rainbow Honey from their website. From now until March 31, you can use the promo code ILOVENAILBLOGS for $5 off your next order! Happy hauling! :)


Disclosure: This polish was provided for my honest review. For more information, please see my disclosure policy.

Wednesday, January 29, 2014

China Glaze Sea Goddess Preview

China Glaze is bringing us six new shimmery textures with their Sea Goddess Collection. China Glaze's previous textured polishes have all been sparkle-free so as a lover of all things glittery, I'm excited to see these! Plus I'm a sucker for anything mermaid-themed!


China Glaze Shell We Dance
Shell We Dance
China Glaze Sand Dolla Make You Holla 
Sand Dolla Make You Holla
China Glaze Wish On A Starfish 
Wish On A Starfish
China Glaze Teal the Tide Turns 
Teal The Tide Turns
China Glaze Seahorsin’ Around 
Seahorsin' Around
China Glaze Tail Me Something 
Tail Me Something
China-Glaze-Spring-2014-Sea-Goddess-Collection

The collection is slated for a January release, so if it's not in your local nail supplier yet, it should be popping up shortly! Will you be on the hunt for any of these?

Tuesday, January 28, 2014

Twinsie Tuesday: My Nail Care Routine

We're doing something a little different for this week's Twinsie Tuesday. Rather than sharing manis, we'll be sharing our nail care routines!

As I was writing out my whole routine, I was afraid I kinda sounded like a complete crazy lady, detailing all of the different steps I do and products I use. But it's a ritual that I enjoying doing and while it might sound like a lot of work, it's also very relaxing for me. I use it as a way to decompress and take some time for myself. So without further ado, here's how I take care of my nails!

A few of my nail care favorites: Essie Feed Me, Deborah Lippmann 2-Second Nail Primer, Barielle Nail Strengthening Cream, Seche Vite & Deborah Lippmann Cuticle Oil

Polish Removal & Nail Upkeep

First thing's first: removing my old manicure. For remover, I recently bought my first bottle of Zoya Remove+ and it absolutely lives up to all the hype! It works wonderfully but doesn't leave my nails feeling as dry and stripped as traditional removers do.

A few times a week, I follow up with Develop 10 Nail Whitening Scrub. I have some bad staining on my nails from polishing them so often and one of my nail care goals this year is to whiten them up. I've only been using this scrub for about two weeks, but there has been a visible difference so far! I know getting the stains to go away will be a gradual process but I'm encouraged by the initial results I've seen with this scrub.

 My essentials for cuticle removal: Blue Cross Cuticle Remover and a Sally Hansen cuticle pusher

As needed, I'll also use a cuticle remover after taking off my polish. My favorite is made by Blue Cross. You can get a jumbo bottle for super cheap at Sally Beauty. After applying my cuticle remover, I use a metal Sally Hansen cuticle pusher to get everything looking nice and tidy. I like this Sally Hansen pusher because the other end of the tool is designed for cleaning underneath your nails, so it's a two-in-one.

Prepping For Polish

Once or twice a week, I'll give my nails a good buffing and do some light filing, all with my Deborah Lippmann Smooth Operator 4 Way Buffer. I'm working on an in-depth review but in short, this is a great buffer if you're like me and tend to get a little overzealous. Deborah designed it so that it won't damage your nails, even if you like to put some extra pressure on.

After buffing, I massage Deborah Lippmann Cuticle Oil into my cuticles. This is one of my absolute nail care must-haves and I'm obsessed with it! Lush Lemony Flutter is another favorite cuticle rescue product. At this point in my routine, I may also slather on some Lush Handy Gurugu Hand Cream if my hands are feeling dry or rough.

Then I apply some Barielle Nail Strengthener Cream. My fellow Twinsie Lakeisha kindly provided me with some of this cream to try and I'm hoping it will work wonders for me like it did for her! My right index and middle finger nails always seem to peel or break and Lakeisha recommended this as a remedy. I haven't been using it for too long but so far, so good!

Next, I usually go mess around on the computer or watch a show or something like that, just to give all the creams and oils time to really sink in. When I'm ready for my actual manicure, I bust out my Deborah Lippmann 2-Second Nail Primer. This is a newer addition to my routine and I thought it sounded like kind of a gimmicky product at first but now that I've been using it, I really like it! What it is, is a primer that you brush across your nails to dissolve any grime and oils on the nail surface, ensuring you have a smooth, clean nail to help your polish go on easier and stay on longer. It's the same general concept as applying primer to your face before putting make-up on and it's a handy little product to have around.

Polish Time!

When I first started getting really into polish, I never wore--or even owned--a base coat. I only started wearing one after I got a free bottle of Seche Clear as part of a promo at Sally. Of course, now I know it's important not to skip base coat, both to lengthen the life of your manicure and to prevent staining. I haven't really committed to a base coat, but two of my favorites are Essie Feed Me and Deborah Lippmann Fast Girls. For glitter manis, I can't live without Nail Pattern Boldness Glitter A-Peel.

Current base coat go-tos: Glitter A-Peel & Fast Girls

As for top coat, I have tried several different ones, but I always seem to wind up back with the ever-popular Seche Vite. It has its annoying quirks (thickness, shrinkage, etc.) but I can't deny how shiny it makes my nails and I love how quickly it dries.

So yeah, that's about it! This is a much longer post than I'd originally anticipated but hopefully I didn't come out of it looking too cray-cray. My personal routine has definitely changed and evolved over time so I'm looking forward to hopefully learning about some new products and tips from my fellow Twinsies' routines!

Alaina at The Little Canvas
Amanda at Amandalandish
Chelsea at Nailed Blog
Elizabeth at Did My Nails
Kelly at Tuxarina
Lakeisha at Refined and Polished
Marisa at Polish Obsession
Rachel at Top Coat It
Róisín at Cuti-CLUE-les
Stephanie at A Little Polish
Traci at DrinkCitra

Sunday, January 26, 2014

Deborah Lippmann Love Is A Battlefield

Nail blogger confession time: I have never tried a magnetic polish. I know, I know, they were a big thing for a while and I'm way late to the party and no one probably even cares about magnetic polish at this point. I've had some Icing magnetic polishes sitting neglected in my untrieds that I bought back when magnet polishes were starting to get popular, but what finally coaxed me into giving magnetic polish a go was Deborah Lippmann Love Is A Battlefield. Love Is a Battlefield is a pretty shade of raspberry that reveals burgundy-colored designs when exposed to a magnet.

While I did mess up a time or two by knicking my nails with the magnet, overall it was very easy to use and the design came out nice and vibrant! I actually don't have the Lippmann magnet that goes with this polish, so I used the magnet for one of my Icing polishes and that worked perfectly!


The formula is excellent. After letting my first coat dry, I swiped on a second and went to work with the magnet. I was surprised to see that the design appeared almost instantaneously. I was under the impression I would have to hold the magnet over my nail for a little while, but that didn't seem to be the case here. The polish also dried quickly and I didn't have any issues with topcoat smearing the design.

So overall, my first experience with magnetic polish was a very pleasant one. I know magnetic polishes are pretty much "over" as a trend but I still had fun with Love Is A Battlefield. If you haven't tried one yet (I can't be the only one who held out on this trend...right?) then I suggest giving it a whirl. They're a cool novelty and I liked the effect more than I thought I would!

Saturday, January 25, 2014

Rainbow Honey The Kraken


Rainbow Honey The Kraken is a teal jelly filled with blue and green glittery goodness and a smattering of chartreuse holo hexes to sweeten the deal. I would have an extremely difficult time choosing my all-time favorite Rainbow Honey polish, but this is definitely a contender. With blue, green and glitter all together in one polish, it's a good bet I'm gonna love it!

The Kraken is not quite as light in person as my pictures show. It's a very rich teal, almost like a jewel tone, and it absolutely gleams in the light! I was staring at my hands all day long.


The formula is on the thicker side, but not to the point that it felt goopy to apply. I used two coats here.

I really can't rave enough about the gorgeousness that it The Kraken. Plus it's just such a fun polish name to say. I had a couple co-workers ask me what I had on and I always had to announce "The Kraken!" in my most dramatic voice.

You can purchase Rainbow Honey from their website.


Disclosure: This polish was sent to me for my honest review. For more information, please see my disclosure policy.

Friday, January 24, 2014

KBShimmer Totally Tubular

KBShimmer Totally Tubular is a bright teal base with blue, indigo and magenta glitter pieces. I received this polish from my polish fairy godmother, Amanda. Thanks girlie!


The first thing that came to mind when I put this polish on was how much I absolutely love the shade of teal used for the base. It conjures up memories of days at the beach and swimming in the ocean. I'm definitely longing for some beach weather right about now! And of course the sprinkling of glitter in top only makes the teal that much prettier. ;)

The formula is wonderful and reaches opacity in two coats. Plus, no staining!

You can purchase KBShimmer from their website.

Wednesday, January 22, 2014

China Glaze Surprise Preview

OPI isn't the only one releasing a glitter-centric collection this March. China Glaze is getting in on the action too with their Surprise Collection, featuring six new glitterbombs. As a self-professed glitter junkie, I can't complain!


Don't Be A Flake
 
I'm A Go Glitter
 
Create A Spark
 
Glimmer More
 
Glitter Up
 
Shine-nanigans

The display photo seems to show these layered over a white base polish, but I'll be curious to see if they are dense enough to wear alone too. Either way, this looks like a fun collection with infinite layering possibilities!

Tuesday, January 21, 2014

Twinsie Tuesday: Lana Del Rey "Young And Beautiful" Nails

This week Twinsie Tuesday theme has us creating gradients with seasonal colors. Late January is kind of a yucky time in Michigan, where everything goes from being snowy white to grey, sloppy and slushy . It's not spring, but it's not exactly a winter wonderland outside either. My first thought was to do something with pastels, because I'm dying to wear spring colors, but with all the wintery mush outside, spring still feels so far away here!

So I turned to another idea. I am a huge Lana Del Rey fan and I've been wanting to recreate her nails in her video for "Young And Beautiful" for quite some time now. Since Lana is sporting a red and gold gradient in the video, this seemed like the perfect opportunity! Plus red and gold are such great colors for winter.


For my version of Lana's manicure, I started with a base of OPI Quarter Of A Cent-Cherry. Then I dabbled on OPI Gliterland with a sponge and basically dicked around until I thought it looked halfway decent. This is only the second gradient I've ever done (the first being my gradient for our TT holiday gift theme), so I won't pretend like I've developed any kind of special techniques. ;)  I wound up with a lot more gold on my nails than I originally intended to, so it's not an exact replica of Lana's look, but I think it turned out pretty well.


As much as I try and avoid nail art, I actually enjoy doing gradients quite a bit! Anything involving lines is always really tricky for me, so I like that gradients don't require a ton of precision to achieve.

If you're looking for more gradients, then be sure to check out my fellow Twinsies too! There are lots of different ways to do gradients, so I'll be interested to see how everyone else chooses to make theirs!

Alaina at The Little Canvas
Amanda at Amandalandish
Chelsea at Nailed Blog
Elizabeth at Did My Nails
Kelly at Tuxarina
Lakeisha at Refined and Polished
Marisa at Polish Obsession
Rachel at Top Coat It
Róisín at Cuti-CLUE-les
Stephanie at A Little Polish
Traci at DrinkCitra

Monday, January 20, 2014

Born Pretty Giveaway Winner

I want to start this post off by thanking all of you who entered my Born Pretty Store giveaway! I've randomly selected a winner through Rafflecopter's random generator and the winner is...

Kyla L!

I've already sent Kyla an e-mail and she has 24 hours to officially claim her prize. So if you're reading this, Kyla, check your inbox! :) Thank you again to everyone who entered!

UPDATE: Kyla has e-mailed me back, so this giveaway is now officially closed!

Review: Born Pretty Silver Square Nail Studs


I want to kick things off with a reminder that if you haven't entered my Born Pretty giveaway yet, today is the last day! Up for grabs is a $20 voucher for Born Pretty Store to use on whatever your polish-loving heart desires. :)

So what better way to mark the last day of the giveaway than by checking out some nail studs from Born Pretty? They have a seriously impressive variety of nail studs in all different shapes and sizes. I decided to try out some 5 mm silver square studs.

The studs are thin but still feel nice and sturdy. I didn't have to worry about bending or breaking them at all when I was playing around with them. $3.99 gets you one bag of approximately 50 studs.

I recently came across this Youtube tutorial from OPI for the Gwen Stefani Collection (you can check out the video HERE) and I thought this would be a fun look to try and recreate with my Gwen OPIs and these studs.


I wore this mani for a little over two days and the studs stayed perfectly in place for the duration of the manicure and they they can also be re-used, if you want. As for the mani itself, I started with a base of OPI I Sing In Color, then did a stripe of OPI In True Stefani Fashion down the center of my nail. While In True Stefani Fashion was still wet, I used tweezers to place the studs, then sealed everything up with two coats of Deborah Lippmann Addicted To Speed Top Coat. My striping skills aren't the best, but hopefully this mani at least gave you some idea of how you can incorporate these studs into nail art ideas. :)

If you would like to order anything from Born Pretty, they offer 10% off for Nailed readers:

www.bornprettystore.com


Disclosure: This product was sent to me for my honest review. For more information, please see my disclosure policy.

Sunday, January 19, 2014

Deborah Lippmann Red Silk Boxers

Deborah Lippmann Red Silk Boxers is a red (you might have guessed that part) featuring Deborah Lippmann's new matteen finish. The matteen finish debuted in the winter Silk Collection and it reminds me a lot of velvet, in that it looks silky smooth and has a beautiful soft sheen when the light hits it. It's not completely matte, but not shimmer-y either.


The formula was decent and covers in two coats. The trickiest part of application for me is that you have to be mindful of where you place your brushstrokes. If you're not careful, they become more noticeable after the polish dries down and mattifies. Although I'm holding a topcoat bottle in these swatches, I didn't wear any topcoat with this mani. I thought this would chip on me really quickly, since I tend to have bad luck with mattes, but I wore it for two days before taking it off and I didn't have any chips!

I love how sophisticated the matteen finish and this color look together. There's something kinda Old Hollywood femme fatale about this polish to me. I'm not a big matte fan but I do like all of these satin-type finishes we've been seeing from brands like DL and OPI in the past few months!

Saturday, January 18, 2014

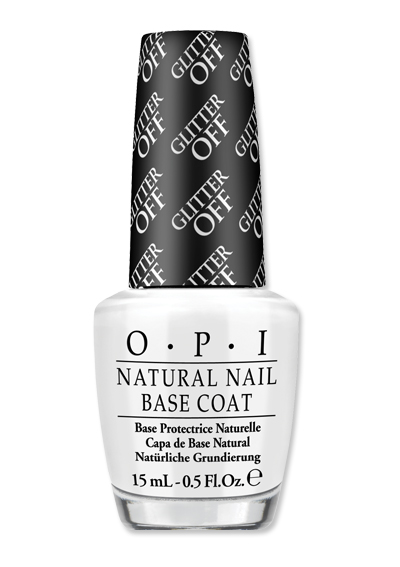
OPI To Release Peel-Off Glitter Base Coat


OPI is releasing their own peel-off base coat for glitter manis called Glitter Off. My current go-to for removing glitter manis is Nail Pattern Boldness' peel-off base coat, Glitter A-Peel, which you can read my in-depth review on (and learn more about the general idea of peel-off base coats) HERE. I love Glitter A-Peel and I'll be curious to see how OPI's version stacks up. It would take a lot to get me to make a permanent switch from Glitter A-Peel!

Glitter Off will launch alongside the Spotlight On Glitter Collection in March. It will retail for $9, the same price as OPI's regular base coat.

Friday, January 17, 2014

OPI Hey Baby

Hey all! Hope you're having a good week so far! I'm getting over some kind of cold/flu yuckiness (I took three naps on Wednesday, which was not as fun as it sounds) but other than that I can't complain! I wanted to throw in a quick reminder that if you haven't already, check out my Born Pretty Store giveaway! There's only a few more days left and free money to buy nail stuff with would definitely be a nice way to start next week, don'tcha think? ;)

Anyways, let's get to swatching! Today I'll be showing you OPI Hey Baby, a bright pink from the Gwen Stefani Collection. This is one of the new creme gloss finish polishes, which means it's extra shiny and glossy-looking! I don't wear pinks like this too often, so it's always kind of a fun change for me. I was surprised how much I liked it!


I did have a bit of a mishap before I took these photos. I recently started using Deborah Lippmann's Addicted To Speed Topcoat, which I absolutely adore except that it has an extremely strong odor that I find very unpleasant. I'm hoping I'll get used to it over time. I should mention too that it's in the same type of bottle as my beloved Deborah Lippmann Cuticle Oil. So I was on the phone with my boyfriend, not really paying attention to what I was doing, when I reached for some cuticle oil to get my fingers ready for swatching. As I was talking, I began to notice a very distinct smell--and it wasn't the coconutty goodness of my cuticle oil... Yep, totally slopped topcoat all over my cuticles by mistake. Go me. So if my edges look a little messy here, now you know why! I had to do some major clean-up!

Anywho, the formula on Hey Baby is stellar and covers in two coats. As I mentioned above, Hey Baby has a high-shine finish, although maybe not as much so as Over And Over A-Gwen. This is a really nice neutral pink that's not too warm and not too cool. I think it's fairly similar to OPI  Kiss Me On My Tulips from the Holland Collection, just not as warm toned. It's the perfect girly shade of pink that you would wear anytime! 

Wednesday, January 15, 2014

Deborah Lippmann Spring Reveries Preview

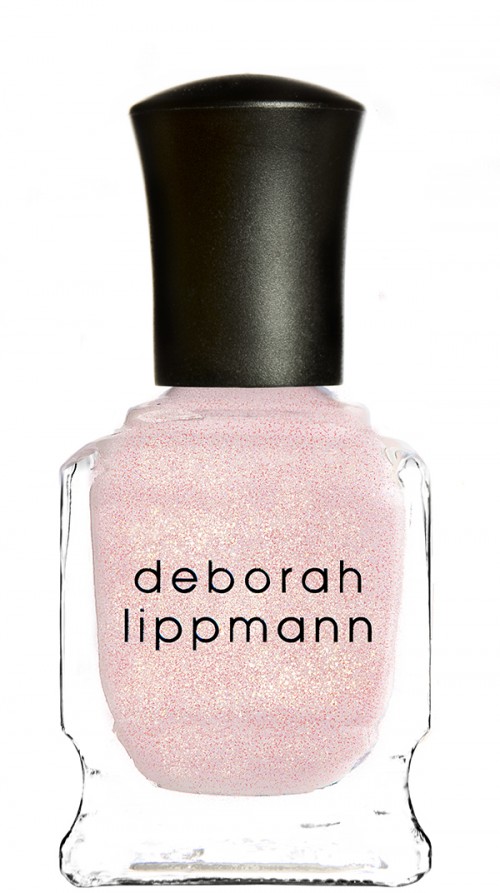
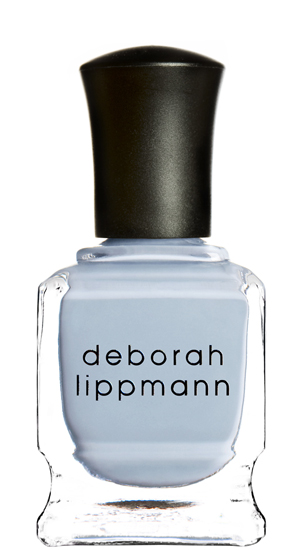
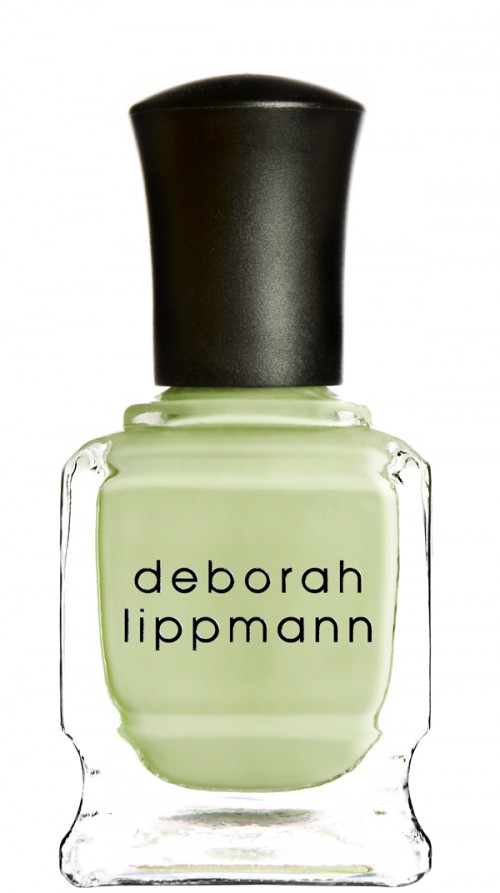
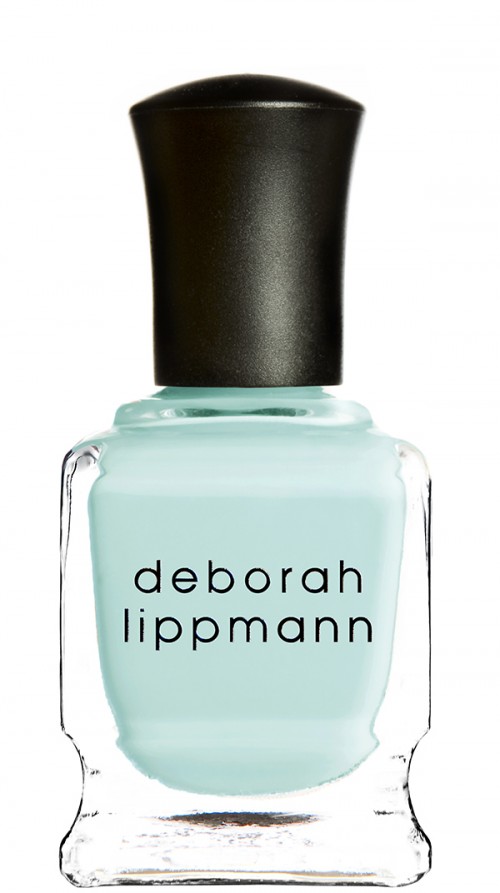
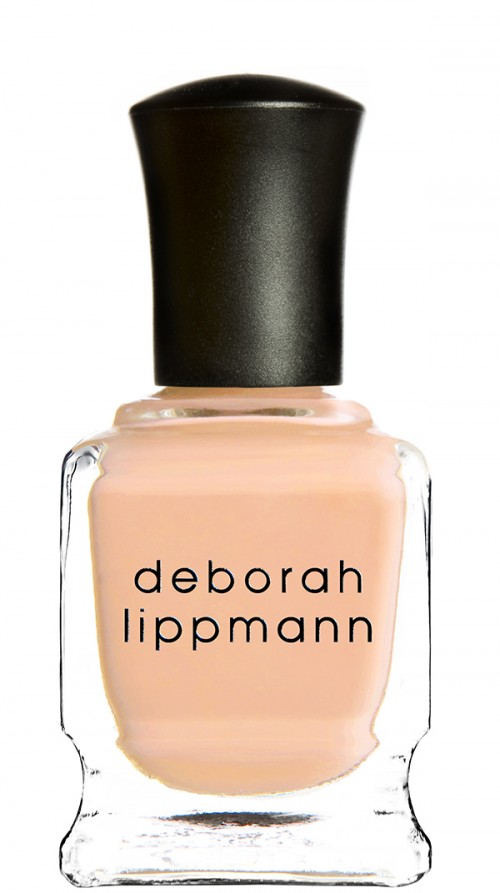
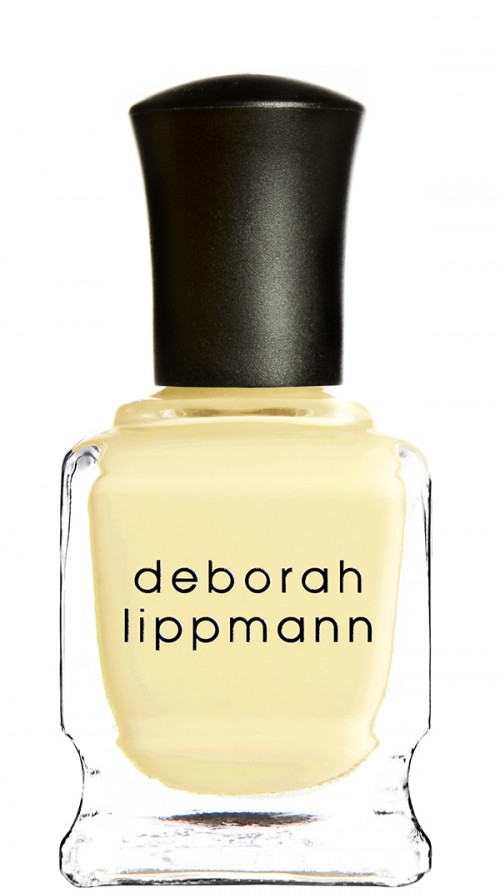
Deborah Lippmann's Spring 2014 collection, Spring Reveries, captures all the colors of a garden in full bloom. If you're a fan of pastels then this is a collection for you!

Deborah Lippmann La Vie En Rose 500x893 Deborah Lippmann Spring 2014 Spring Reveries   Coming Soon
La Vie En Rose
Deborah Lippmann Blue Orchid Deborah Lippmann Spring 2014 Spring Reveries   Coming Soon 
Blue Orchid
Deborah Lippmann Spring Buds 500x893 Deborah Lippmann Spring 2014 Spring Reveries   Coming Soon
Spring Buds
Deborah Lippmann Flowers In Her Hair 500x893 Deborah Lippmann Spring 2014 Spring Reveries   Coming Soon
Flowers In Her Hair
Deborah Lippmann Tip Toe Through The Tulips 500x893 Deborah Lippmann Spring 2014 Spring Reveries   Coming Soon 
Tip Toe Through The Tulips
Deborah Lippmann Build Me Up Buttercup 500x893 Deborah Lippmann Spring 2014 Spring Reveries   Coming Soon
Build Me Up Buttercup

The collection is already available on Deborah Lippmann's website. I love pastels but I'll be waiting for swatches before I make my final purchasing decisions. At $18 a pop, I want to see if I already have some dupes of these colors in my stash! But I'm sure I'll wind up with a few of these pretties. :)